
We had two major cosmetic issues on Harmonie that we wanted to take care of, both related to 25 years of sun exposure. First, are the fixed port lights. All of them were severely crazed from sun exposure, and had also changed in color quite a bit, and they just were not as clear as they used to be.


Closely related to this issue, were the wood frames that hold the acrylic panels in place. Sun coming in the windows had faded the varnish and in some places the wood itself, to an unattractive yellow color. In a few places, the varnish was beginning to fail, which would allow water from condensation on the windows to enter and damage the wood. It was time to disassemble the whole system and replace and repair as needed.
Words of Warning: These windows are part of a multi-layer system designed to be very strong, but not made to be easy to take apart. Be prepared for some effort, and a lot of time. A time budget of 100 to 150 hours is not unreasonable. All of the following comments are based on our boat, Hull Number #160. Be prepared for differences, and the further your hull number is from ours, the greater those differences might be.
Additional Words of Warning: You are very unlikely to be able to remove all the existing acrylic windows without breaking at least some. So be prepared to have new ones machined. In addition, is is quite possible that the interior plywood window frames will be damaged to the extent that they need to be re-veneered, or even replaced. Don’t start this project unless you have the time and local resources to replace these parts if needed. Be prepared to do whatever it takes to keep water out of the boat of as long as the project takes!
How things are put together
The attachment system is composed of five layers. Some are structural, some decorative.
Starting on the outside of the hull is the stainless steel trim. It is countersunk to accept the stainless steel, flat head, slot drive, style of screw that Amel used throughout the boat. Under the stainless trim is the hull itself. The vertical part of the hull is solid FRP, about 0.25” (0.6 cm) thick.
Horizontally between the windows on the outside surface of the hull is black trim. On our boat that trim was paint, I am told that on other production runs Amel used black gelcoat, and for still others, applied black vinyl. If you have everything apart anyway, it might be a good time to renew this finish. While the windows and trim were off we used black, 3M brand, car wrap vinyl to cover this space, and give us a factory new finish.
After the hull are the acrylic windows. The plastic is 13 mm (0.5 inch) with a rabbet cut around the edge so it overlaps the interior of the hull by about 25mm (1 inch) and sits flush with the exterior of the hull. These windows are glued in place with silicone, and clamped in place by machine screws that go through the external stainless steel trim, the hull, the acrylic itself, and the interior wood frame. It is a VERY strong system.
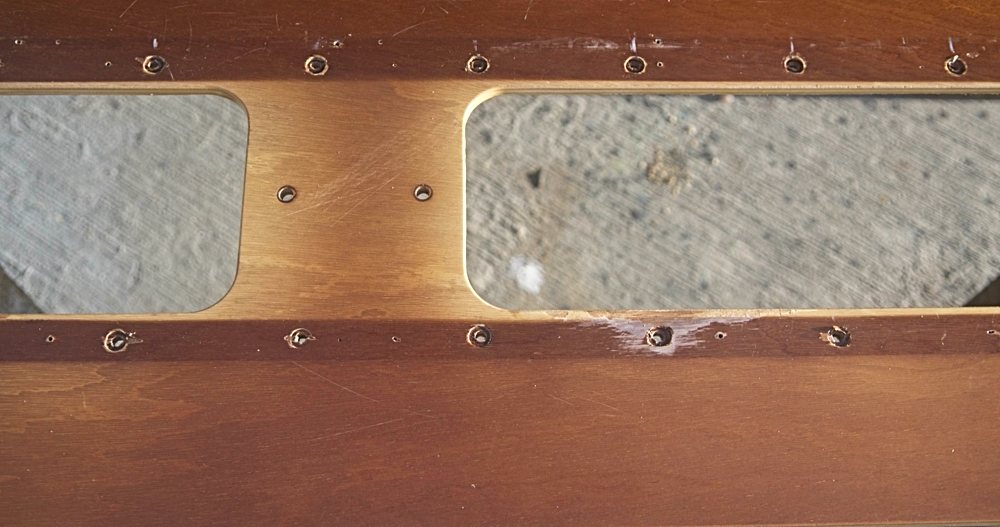
That interior wood frame is plywood veneered front and back with African Mahogany. It is held in place by wood screws and the machine screws that hold the windows. Nuts are in the inside of the wood frame, and the ends of the bolts are cut off flush with the nuts so they will fit under the trim moulding.
The last layer is the interior trim pieces of “C” moulding of solid Mahogany. These are strictly cosmetic to hide the nuts, and are held in place with a combination of wood screws and small brads.

Everything is secured by multiple different fasteners. There are some VERY short self-tapping screws for places where there is nothing to attach to except the relatively thin fiberglass hull. For places where there are wood panels to screw into, there are two different styles of screw used: A standard wood screw, and a self tapping screw. They are similar in size, and I can see no reason why one was chosen over the other. On our boat, the wood screws were only used forward of the ports in the forward cabin. Everywhere else, the self tapping screws were used. Where the windows are in the mix, there are machine screws and nuts. Finally, there are machine screws and binding bolts (also called “sex bolts”) through the ends of the windows in the main and aft cabins.
I’d recommend buying a box of 100 M5 flat head, machine screws, 50mm in length, a matching box of nuts, and one of washers. Having new ones means you’ll have to cut them to length when you are finished, but it will make the overall process go a lot faster than struggling with reusing the old ones.
If that was all there was to it, it would be easy… but it also wouldn’t work because we need to make sure water stays on the outside of the boat, where it belongs. For this purpose Amel used silicone sealant—and lots of it. In addition to sealing the screw holes, it also glues the acrylic windows and the inner plywood frame to the hull with a strong, and robust, yet flexible, bond.
Disassembly—Out with the Old.
To take all this apart, start with removing the curtains. The rails that hold the curtains can be removed now, or you can wait until later when you are ready to refinish the wood.
Remove the trim rails from the inside of the wood panels. These are held in place by screws, and, in some places, brads. If the trim pieces don’t immediately come off after taking the screws out, very gently pry it off to remove the brads. Only work right next to the brad, if you try to use the length of the wood to leverage out the small nail you risk breaking the wood trim.
Next, go outside. Remove the screws from the stainless steel trim. Note as you go which size and type of screw is in which hole. You’ll need that to get things put back together correctly. You’ll be pulling a LOT of screws. A good drill/driver will save your wrists and arms! When you get to the bolts over the windows, you’ll need an assistant inside to hold a wrench on the 8mm nuts.
The stainless trim pieces are weakly held by the silicone under them. Be gentle with the pieces all the way forward and all the way aft. They have welds that are not very strong, and will need to be babied while handling to prevent bending and possible breaking. Again, note where the trim pieces came from to be sure you know where they go back. Although, with typical Amel persnicketiness, the hole patterns align everywhere.
I would suggest only removing the pieces of SS trim that actually cover the windows. When you pull the screws the only way to be sure you really get them sealed 100% watertight is to also remove the interior wood panel they are screwed into, and I am betting you won’t want to do any more of those than needed by the time you are finished with the next step…
Now the everything is unscrewed, and unbolted, it is time to remove the interior wood panels. This part of the job is the most difficult, and requires both force and finesse, and a very large dose of patience. Various sizes of wood wedges, long, heavy, flat-blade screwdrivers, small prybars, and sharp putty knifes will be helpful.
The basic idea here is to put the silicone glue under tension. If you are lucky, it will begin to peel off. If it does begin to peel, keep it under tension and be very patient, be satisfied with a little progress at a time. If it does not peel, then you will need to cut it. A very sharp putty knife, or broad sharp chisel will slice easily into the silicone if it is under tension. It will be a long sequence of cutting, and wedging, cutting and wedging. Gaining just a centimeter or two at a time.
You can only reach up from the bottom of the panel, the top is too close to the ceiling for access with tools, so you’ll need some longer cutting tools when dealing with the wider panels. Take care to protect the vinyl headliner. Thin wood or plastic strips (paint stirrers work well) should be between and wedge or prying tool and the vinyl.
To give you a feel for the time budget needed here, our most difficult panel took over six hours to remove while the easiest took less than one. So based on our experience, this step in the project could be done in a day, or take most of a week of hard work. Expect to break at least some of the acrylic windows, and try very hard not to damage the plywood frames. We did not remove the windowless wood panel over the nav station, nor the one over the starboard side closet in the aft cabin.
And In with the New…
Once everything was apart, we took the acrylic windows (a few of them in pieces!) to the local plastic fabricator to have new ones made. We considered various colors from water-clear to “dark bronze.” We settled on a “medium gray” which cut bright sun some, but wasn’t too dark in lower light situations. We decided to not have the screw holes pre-machined into the windows. This would give us a bit more flexibility in the positioning of the parts on assembly, and saved money on the machining costs.
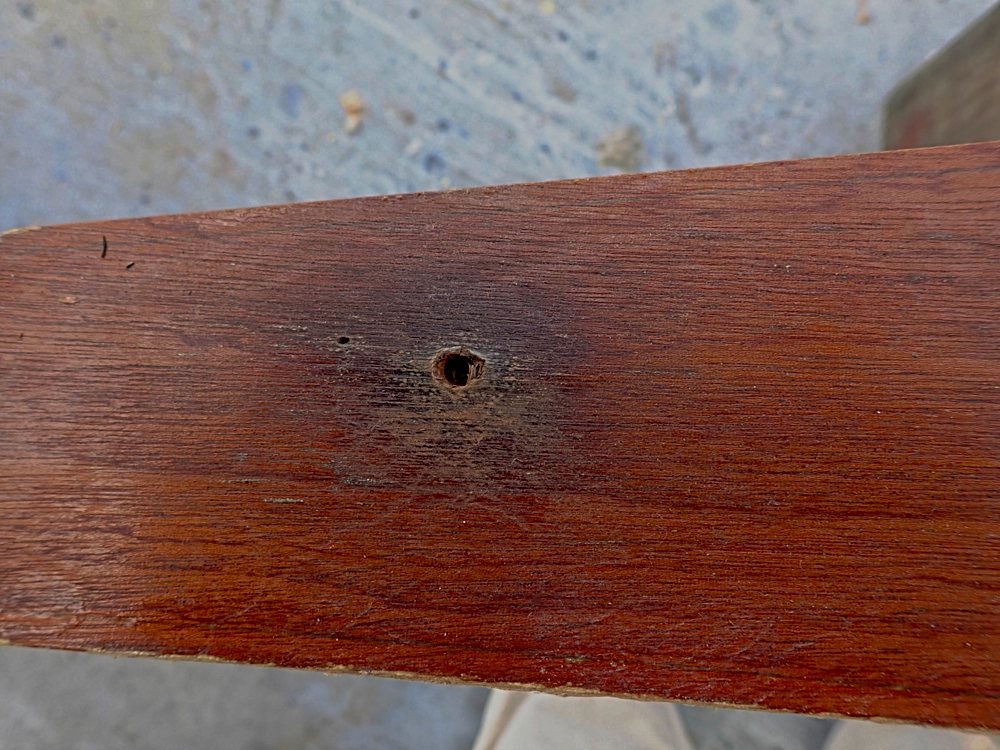
Several of the wood panels had wood that deteriorated from small amounts of water intrusion around the screw holes. The punky wood was removed, and the resulting gaps filled with ticked epoxy to give the screw something solid to bit into.
The wood frames we had worked on by a local refinisher here in Fort Lauderdale. We talked to several before choosing. The job was going to be delicate with gentle scraping and sanding needed to avoid going through the surface veneer, and the satin finish was not typical of varnish work.
One vendor was rejected because his answer to the faded wood was to stain the whole piece, even after being shown the wood was in good shape and a little delicate scraping would restore the color. Stain is not the answer, because matching the rest of the wood in the cabin would never be possible.
Another possible refinisher was obviously confounded by anything other than a high gloss finish. This is probably a part of the project I would have preferred to do ourselves, but we just didn’t have the time with the press of other projects.
In the best of all possible worlds the wood would be finished with gloss, two-part polyurethane, and then wet sanded in progressively finer grits down through rottenstone until the finish matched the smooth satin of the Amel factory. We instead opted for using a satin finish one part varnish which gave us 98% of the look for a tiny fraction of the cost and effort.
As an additional improvement, we painted the outward facing side of the wood frames black. In theory, this area would be fully covered by the silicone. The paint serves to ensure we get a uniform look, and protects from any UV exposure. We also wrapped this paint around the edge of the wood frame around the window to improve UV stability.
Reassembly
Once you have the refinished wood in hand, and the new windows, it is time to put everything back together. If you have a carefully practiced team of a half dozen technicians (like at the Amel factory!) you can probably get the whole assembly back together in one go. There was no way we were going to be able to do that, so we divided the process up into stages over multiple days.
First, we held the new acrylic windows in place, and with the proper kind of drill bits for plastic, we drilled the holes where the bolts clamp through. Then, the windows were glued in place with GE SCS2000 black silicone and clamped in place with the bolts. Between the window and the hull at each bolt we added a flat washer to be sure we kept the recommended minimum thickness of the silicone.
We used this particular silicone in part because it has a significantly longer working time than the usual marine products which can skin over in as little as five minutes. It is a structural adhesive widely used for glueing frameless windows in place. We have used it in the past with great success for glueing lenses into deck hatch frames. It is similar in specification to Dow’s 795 silicone. Both of these are “neutral cure” silicones and do not give off acetic acid as they cure. Either the GE or the Dow product should work very well in this application

After the silicone under the windows cured, we removed the bolts, and installed the wood panels. Each wood panel had silicone liberally spread around each bolt or screw hole, and completely covering the part of the panel covering the windows. Once that silicone cured, again the bolts and screws were all removed, and the outer stainless steel trim strips were installed.
If I was doing this again (and I hope I never have to!) I’d trim the headliner back away from the screw and bolt holes so the silicone could bond directly to the FRP. This would discourage any leaking water from getting under the headliner and traveling to who-knows-where and also result in a stronger bond than the original design.
In some places the stainless steel trim needed to be secured with a fastener but there was no place behind the hull with wood to screw into or bolt through. Amel used VERY short self tapping screws engaging the FRP. We drilled, and tapped those holes for helicoils, and used shorter versions of the same M5 machine screws that hold the windows. More secure, and better clamping force available for making everything water tight.
Results
This was one of the bigger projects we have undertaken on Harmonie. We think it has been a great success. The interior wood trim looks like new.

The new windows are now clear and transparent, and in our opinion the gray tint is a great improvement over plain, clear acrylic. From the outside, the black trim strip across the raised cabin top now is a shiny unbroken strip, like one long black window. The black silicone we used as sealant and adhesive effectively masks the wood from the outside. The effect is very much what I imagine the designer had in mind for when a Super Maramu left the factory.
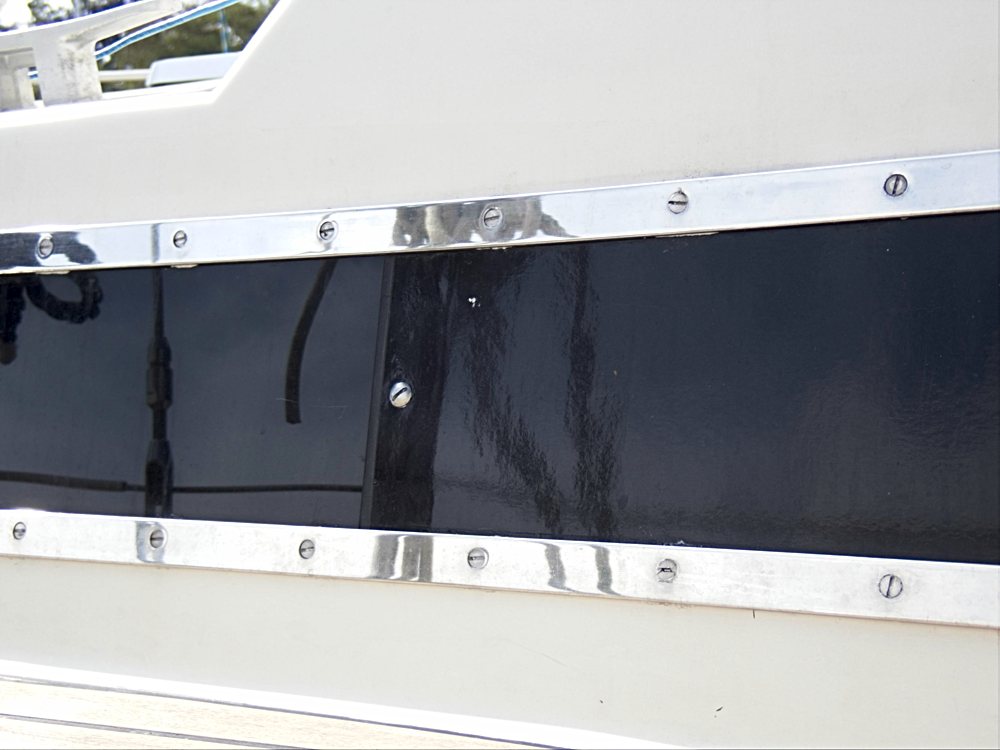
One of the windows is to the left, and the black vinyl trim is to the right.
